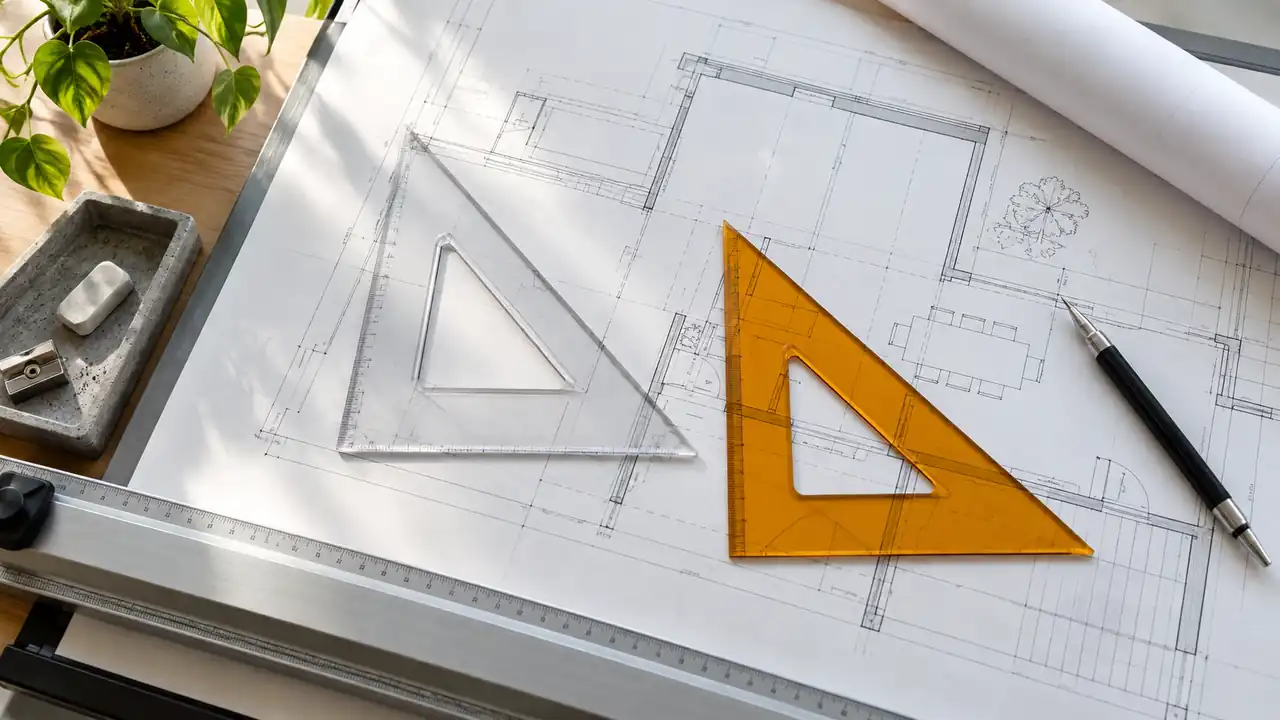
Drafting triangles are simple tools with a surprisingly wide range of uses. Set one against a T-square and it becomes a fast way to draw verticals, 30-degree lines, 45-degree diagonals, and accurate perpendiculars. Combine two triangles and you can create parallel lines at several angles without reaching for a protractor.
Learning how to use drafting triangles is less about memorizing every marking and more about controlling the tool against a reliable straightedge. The T-square or parallel rule establishes the reference direction, while the triangle supplies the angle. Once those two jobs are kept separate, manual drafting feels far less fiddly.
What Drafting Triangles Are Designed to Do
A drafting triangle is a flat, transparent or translucent set square with two perpendicular edges and one angled edge. The two most common fixed-angle versions are the 45-degree triangle and the 30/60-degree triangle. A 45-degree triangle has angles of 45°, 45°, and 90°. A 30/60-degree triangle has angles of 30°, 60°, and 90°.
The long straightedge of a T-square, parallel rule, or drafting machine provides the baseline. The triangle rests against that baseline so its edges remain at known angles. This arrangement is useful for technical drawings, lettering guides, construction lines, diagrams, floor plans, and geometric layouts where repeated angles need to stay consistent.
| Triangle Type | Angles | Common Drawing Uses |
|---|---|---|
| 45-Degree Triangle | 45°, 45°, 90° | Vertical lines, horizontal lines, and 45-degree diagonals |
| 30/60-Degree Triangle | 30°, 60°, 90° | 30-degree and 60-degree lines, verticals, and isometric-style layouts |
| Adjustable Triangle | Variable angle, depending on the model | Nonstandard angles and repeated angle settings |
Although some triangles include graduations, they are primarily angle-guiding tools rather than substitutes for a scale ruler. A triangle may help you establish direction, but a separate ruler or scale is normally used to measure length.
What You Need Before Drawing
The basic setup is straightforward: a stable drawing surface, paper, a T-square or parallel rule, one or more triangles, and a pencil or technical pen. A clean sheet matters because a grain of graphite or a tiny scrap of paper under the triangle can create a visible wobble along an otherwise precise line.
Use a sharp pencil for light construction lines and a suitable technical pen only after the layout has been checked. If you are working in ink, confirm which edge of the triangle is intended for ruling. Some drafting triangles have a raised inking edge that keeps wet ink from touching the plastic and spreading beneath it, while others are meant mainly for pencil work.
Keep the Reference Edge Stable
Before drawing, place the T-square head firmly against the edge of the board or use the parallel rule according to its design. The reference edge should travel smoothly without rocking. On a crowded desk, a clipped sheet, eraser, or pencil under the T-square can shift the baseline by a small amount, and that small shift will repeat across every line drawn from it.
If the paper is loose, secure it with drafting tape or another method suitable for the paper and drawing surface. Do not press so hard that the sheet buckles. A flat sheet lets the triangle slide cleanly, with a soft plastic whisper instead of a catching, jerky movement.
How to Use a Drafting Triangle Step by Step
-
Establish a straight reference. Position the T-square or parallel rule so its working edge represents the horizontal direction of the drawing. Check that it is seated properly before placing the triangle.
-
Place the triangle against the reference edge. Rest one straight edge of the triangle against the T-square or parallel rule. Keep the contact continuous. If a gap appears between the tools, the angle may no longer be reliable.
-
Choose the required triangle edge. The edge you use determines the line angle. On a 45-degree triangle, the sloping edge produces a 45-degree line. On a 30/60-degree triangle, the two non-perpendicular edges produce 30-degree and 60-degree lines.
-
Hold the triangle without twisting it. Place your non-drawing hand near the middle of the triangle and apply light, even pressure. Avoid pressing directly on a corner, which can pivot the triangle slightly.
-
Draw with the tool edge as your guide. Start the pencil or pen slightly inside the edge and pull in one smooth motion. Keep the point in contact with the paper and avoid stopping halfway through a long line unless the drawing requires it.
-
Slide the triangle when a parallel line is needed. Keep the triangle against the T-square or parallel rule while moving it to a new position. The reference edge controls the direction, so the same triangle edge will produce a line parallel to the first.
-
Check the result before removing the setup. Look for gaps, unintended changes in angle, and lines that stop short of their intended intersections. If several lines should be parallel, compare their spacing with a ruler or scale rather than relying only on appearance.
For example, to draw a row of evenly oriented 45-degree construction lines, keep the 45-degree triangle against the T-square and slide it along the baseline between strokes. The triangle does not need to be rotated for each line. That small habit saves time and prevents the familiar staircase of almost-parallel lines that appears when the tool is repositioned by eye.
Drawing Vertical and Horizontal Lines
A drafting triangle is especially useful for vertical lines. Place one of its perpendicular edges against the T-square. The other perpendicular edge will point at 90 degrees to the T-square, allowing you to draw a vertical line while the triangle remains supported by the horizontal reference.
The T-square alone is normally enough for horizontal lines, but the triangle can still help when a line must begin or end at a precise point relative to another angle. Slide the triangle along the T-square until the desired edge passes through the point, then draw the line. This is useful in a floor-plan detail where a wall line, opening, or dimension extension needs to meet a vertical construction line cleanly.
To draw a perpendicular from a point on an existing line, align one triangle edge with the line and draw along the edge at 90 degrees. If the existing line is not horizontal, the triangle may need to be supported by another straightedge or by a carefully aligned second triangle. The important principle is that perpendicularity comes from the triangle’s right-angle relationship, not from the paper’s orientation on the table.
Drawing 30-Degree, 45-Degree, and 60-Degree Lines
Using a 45-Degree Triangle
Place the 45-degree triangle against the T-square with the desired sloping edge facing the area where you will draw. One sloping edge produces a line rising at 45 degrees from the horizontal, while reversing the triangle creates the opposite diagonal direction. This is useful for diagonal construction, simple pictorial sketches, chamfers, and layouts based on equal horizontal and vertical movement.
When two 45-degree lines meet, inspect the direction carefully. Rotating the triangle or flipping it over changes whether the line rises to the right or rises to the left. A quick pencil mark near the intended start point can prevent an entire set of diagonals from leaning the wrong way.
Using a 30/60-Degree Triangle
The 30/60-degree triangle has one edge at 30 degrees and another at 60 degrees relative to the baseline. Use the edge that matches the angle required by the drawing, keeping the appropriate straight side against the T-square. This triangle is common in isometric-style drawing, where axes are often represented by vertical lines and lines at 30 degrees to the horizontal.
For an isometric-style box, the vertical edges are drawn with the triangle’s perpendicular edge, while the receding edges use the 30-degree edge. A kitchen cabinet sketch or small mechanical form can quickly take shape from those three directions, but the method is still a construction convention rather than a guarantee that every object will look realistic from every viewpoint.
How to Draw Parallel Lines at an Angle
Parallel lines have the same direction and do not converge when extended. A triangle lets you repeat an angle, but the supporting T-square or parallel rule keeps that angle from drifting as the triangle moves across the sheet.
-
Place the selected triangle edge against the T-square or parallel rule.
-
Draw the first angled line.
-
Keep the triangle pressed lightly against the reference edge and slide it to the new location.
-
Draw the next line using the same triangle edge.
For closer spacing, use a ruler to mark the starting points before sliding the triangle. In a hatch pattern, for instance, a series of 45-degree lines may look uneven if their endpoints are placed by eye even though their angles are correct. Measuring the interval first gives the pattern a steady rhythm.
Combining Two Drafting Triangles
Two triangles can be used together to draw parallel lines without moving the angle-setting triangle. Place one triangle against the T-square or parallel rule. Butt the second triangle against the first, using a straight edge as the sliding support. Hold the second triangle in place, slide the first triangle along the reference, and then move the second triangle to the required location.
This method is helpful when the line must remain at a particular angle while the working triangle travels across a large sheet. The arrangement may feel a little clumsy at first, especially on a small desk where the plastic edges click against one another, so practice with light construction lines before using ink.
Triangles can also be combined to create angles that are not available from a single edge. For example, reversing or pairing common triangles can produce other directions, but the exact result depends on which edges are aligned. Confirm the geometry with a protractor or angle reference when the drawing has a formal angular requirement.
Using an Adjustable Triangle
An adjustable triangle has a movable blade or pivoting section that allows the user to set an angle rather than relying only on fixed 30°, 45°, and 60° edges. The procedure varies by design, so the manufacturer’s instructions should be followed for locking the angle and reading the scale.
Set the desired angle, tighten the adjustment enough to prevent movement, and test the triangle on scrap paper before beginning the final drawing. A loose pivot can shift while the pencil is moving, leaving a line that starts correctly and finishes several degrees away from the intended direction. Adjustable triangles are useful for nonstandard angles, but they require more checking than a fixed triangle.
Common Errors When Using Drafting Triangles
- Using the wrong edge: A 30/60 triangle has two different sloping angles. Confirm whether the selected edge is 30° or 60° before drawing.
- Letting the triangle drift: Lightly hold the tool near its center instead of pushing only on a corner.
- Using a dirty reference surface: Graphite dust, eraser crumbs, and tape edges can create a gap between the triangle and T-square.
- Measuring with an unverified edge: Use a dedicated ruler or scale for lengths unless the triangle’s graduations are clearly intended for that purpose.
- Drawing against a damaged edge: Nicks and chips can create small breaks or bends in a line. Set the tool aside if its working edge is no longer straight.
- Rubbing wet ink: Allow ink to dry according to the medium’s requirements before sliding the triangle across it.
- Rotating the paper unnecessarily: Keep a consistent reference direction when possible. Rotating the sheet can make the drawing harder to read and increase alignment errors.
A useful check is to draw a short test line on scrap paper before starting a dense layout. If the line does not meet an existing construction line as expected, adjust the triangle and reference edge immediately rather than trying to disguise the error later.
Cleaning, Storage, and Care
Wipe drafting triangles with a soft, clean cloth when graphite, dust, or ink residue builds up. Avoid aggressive solvents unless the manufacturer specifically identifies them as safe for that triangle’s plastic, printed markings, or coating. A cloudy surface can make small construction points harder to see, while damaged graduations may no longer be trustworthy.
Store triangles flat or in a protected holder where their edges will not rub against metal tools, blades, or rough desk surfaces. Do not place heavy equipment on top of them. A triangle that looks intact can still develop a slight bend or edge nick, and precision work will reveal that damage quickly.
Final Technique Check
Using drafting triangles well means controlling three things: the reference edge, the selected angle, and the movement of the tool. Let the T-square or parallel rule establish direction, let the triangle establish the angle, and use a separate ruler or scale when length must be measured.
Start with light construction lines, check intersections and parallel spacing, then add darker lines or ink after the geometry is sound. With that sequence, a drafting triangle becomes more than a plastic set square. It becomes a repeatable method for building clean, consistent technical drawings.
