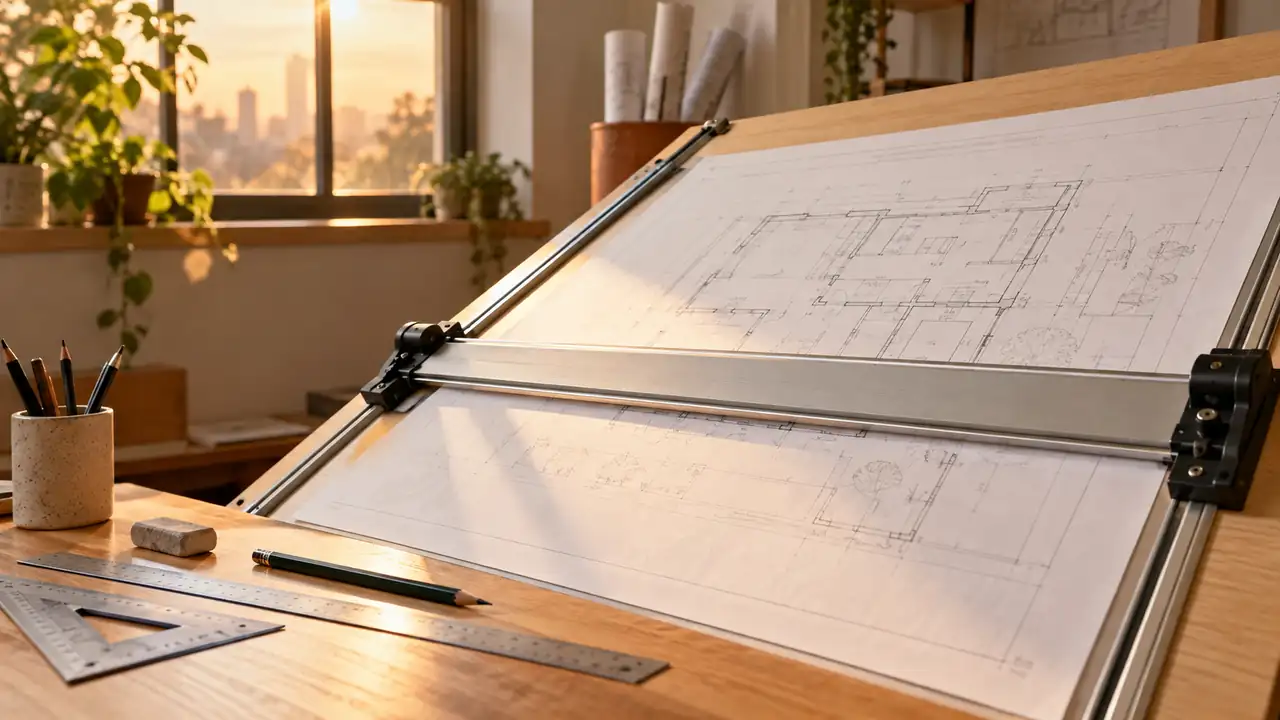
When a horizontal line needs to cross an entire drawing sheet, a parallel bar drafting board lets the straightedge travel up and down while staying parallel to the board’s edges. Instead of repeatedly repositioning a T-square, the drafter moves the bar to the required height, holds it against the paper, and draws along its edge.
The mechanism is simple in principle but carefully arranged in practice. A straightedge is connected to cables, cords, pulleys, or guide hardware that control its movement. As the bar slides vertically, the supporting system keeps both ends traveling together, so the working edge remains parallel to the board. That is the central answer to how a parallel bar drafting board works.
What a Parallel Bar Drafting Board Is
A parallel bar drafting board is a drawing board with a long horizontal straightedge mounted across its surface. The straightedge can move upward and downward over the sheet while maintaining the same orientation. The board may be flat or attached to an adjustable drafting table, and the bar is usually designed to cover much of the board’s usable width.
Unlike an ordinary ruler, the parallel bar is not meant to be picked up and placed by hand for every line. It is part of the board itself. A student drawing a floor plan can slide it from the lower margin to the upper wall lines without losing horizontal alignment. Someone lettering a title block can also use the bar as a steady baseline guide, with the paper staying fixed beneath it.
The straightedge itself normally has a clear or neutral working edge that rests close to the drawing surface without pressing heavily on the paper. Some designs include a thicker body for rigidity, while others use a slim bar that leaves more of the sheet visible. Details vary, but the alignment principle remains the same.
The Mechanism Behind the Parallel Movement
Most traditional parallel bar boards use a pair of cables or cords connected to the two ends of the straightedge. The cords travel through pulleys mounted near the sides or corners of the board. When the bar moves upward, the cable arrangement forces the left and right ends to move together. When it moves downward, the same arrangement keeps the bar level.
Think of the bar as a bridge suspended between two controlled paths. If one end moved freely while the other stayed behind, the edge would rotate and stop being useful for horizontal drafting. The cable system prevents that independent movement. It distributes the motion across both sides, preserving the bar’s parallel relationship with the board.
Some boards use counterweights or tensioning components to make the bar easier to raise and lower. The added tension helps the straightedge stay in position instead of drifting under its own weight. Other designs rely more heavily on friction, guides, or the geometry of the cable routing. The exact construction depends on the manufacturer and model, so replacement parts and adjustment methods are not universal.
Why Both Ends Must Move Together
A long straightedge magnifies even a small alignment error. If the left end rises slightly before the right end, the bar rotates by a small angle. That may be obvious when drawing a long horizontal construction line, but it can also affect lettering guides, dimension lines, and the layout of repeated details.
For example, a drafter working on a narrow elevation may move the bar only a few inches between lines. The motion feels minor, yet the edge still needs to remain parallel each time. On a large architectural sheet, the same mechanism may guide horizontal lines across a much wider working area, where a slight twist becomes easier to see.
How the Bar Stays Parallel to the Board
The board’s mounting geometry establishes the reference. The bar is installed so its working edge is parallel to the board’s lower or side edges, and the cables or guides preserve that relationship as it travels. The system does not automatically make every line on the page correct. It maintains the bar’s orientation relative to the board.
That distinction matters when a sheet is mounted crookedly. If the paper is not aligned with the board, a line drawn against a correctly operating parallel bar may still look angled relative to the paper’s printed border. The drafting surface, paper, and straightedge need to be treated as one aligned setup.
A quick check is useful before starting a detailed drawing. Place the bar near the bottom of the board, align it with a known horizontal reference, then move it toward the top. If the edge stays visually parallel to the reference at several positions, the system is behaving as intended. If the gap changes noticeably from one end to the other, the bar or board may need adjustment.
How to Use a Parallel Bar Drafting Board
The basic procedure is straightforward, although careful paper placement makes a major difference. The following sequence works as a general guide, but the board’s own instructions take priority when its cable routing or locking system differs.
- Secure the board. Place it on a stable drafting table or work surface. If the board is mounted to an adjustable table, set the working angle before aligning the paper.
- Inspect the movement. Move the bar slowly through part of its range. It should travel smoothly, and both ends should rise and fall together without excessive looseness.
- Position the paper. Align the sheet with the board’s reference edges or registration marks, then secure it with tape, clips, or the board’s built-in holding features. Leave enough room for the bar and any triangles or other tools.
- Check the horizontal reference. Move the bar across the sheet and compare its edge with the paper’s top or bottom border. Correct the paper position if necessary.
- Move the bar to the required height. Use one hand near the center or move the ends evenly, depending on the board’s design. Avoid dragging only one corner unless the mechanism is specifically made for that action.
- Draw against the working edge. Hold the pencil, lead holder, or technical pen at a consistent angle and guide it along the edge without forcing the bar sideways.
- Recheck alignment when needed. For important construction lines, verify that the bar is fully seated and parallel before drawing. A light test line in scrap space can reveal an alignment problem early.
Suppose a student is laying out several floor-plan grid lines. The bar can be positioned at each measured height, and a triangle can be held against it to draw vertical lines. The bar provides the horizontal reference, while the triangle supplies the perpendicular direction. That combination creates a basic manual drafting system without requiring a separate T-square for every horizontal line.
Using Triangles and Other Tools With the Bar
The parallel bar is primarily a horizontal guide. It does not usually replace every other drafting instrument. A 45-degree triangle, 30/60-degree triangle, or adjustable triangle can rest against the bar to create vertical lines and selected angles.
For instance, to draw a vertical wall line, place one edge of the triangle against the parallel bar and draw along the triangle’s perpendicular edge. To create a repeated set of vertical lines, keep the triangle firmly against the bar while moving it sideways. The bar maintains the horizontal position, and the triangle maintains the angle.
A scale ruler can be used near the bar to measure distances, but the ruler should not be treated as an alignment substitute unless its edge is designed for that purpose. A scale is graduated for measurement, while the parallel bar is designed to provide a stable straight reference. Mixing those roles can lead to lines that look neat but are measured incorrectly.
Parallel Bar Versus a T-Square
| Feature | Parallel Bar | T-Square |
|---|---|---|
| Connection to the board | Mounted to the board with cables, pulleys, guides, or related hardware | Usually rests against the board’s edge or a separate drafting ledge |
| Movement | Slides vertically while remaining parallel to the board | Is lifted and repositioned manually |
| Typical advantage | Convenient repeated horizontal positioning across a fixed sheet | Portable, simple, and useful on different boards |
| Main concern | Cable tension, pulley condition, and alignment | Keeping the head firmly against the board edge while drawing |
A T-square depends on contact between its head and the board’s edge. The drafter slides the head along that edge, and the blade provides the horizontal guide. A parallel bar is permanently associated with the board, so the user does not need to maintain that edge contact by hand.
Consider someone switching between two work surfaces. A T-square can travel with the drafter and be used wherever there is a suitable straight edge. A parallel bar is less portable, but it offers a more integrated setup when one board is used repeatedly for plans, elevations, lettering, or technical layouts.
Setting Up the Board for Accurate Drafting
Accuracy begins before the first line. Place the board on a stable support and check that it does not rock or flex during use. If the board moves while the bar remains aligned, the finished line can still wander because the entire reference surface has shifted.
Mount or place the sheet so its intended horizontal and vertical directions agree with the board. Paper edges are useful references, but they are not always perfectly trimmed or aligned. For a precise drawing, use the board’s reference marks or a known construction line rather than assuming every sheet edge is exact.
Checking the Parallel Bar
Move the bar to several positions, including near the top, middle, and bottom of the usable area. Watch the gap between the bar and a reliable board edge or a carefully aligned sheet border. The gap should remain consistent from left to right at each position.
If one side sits higher, possible causes include uneven cable tension, a displaced pulley, a loose mounting point, or a board that is not level relative to its supporting surface. Some systems provide adjustment points, while others require specific rethreading or servicing. Do not alter cable routing casually, because an incorrect path can make the bar bind or move unpredictably.
Common Problems and Their Causes
The Bar Drifts or Will Not Stay in Place
Drifting may result from reduced cable tension, worn friction surfaces, a displaced counterweight, or a design that does not include a positive locking feature. A light touch while drawing can also push the bar if the straightedge is not meant to be locked. Check the manufacturer’s care and adjustment instructions before tightening hardware or adding tension.
One End Moves Ahead of the Other
Uneven movement usually points to a problem in the cable, pulley, guide, or mounting arrangement. Dust and debris can interfere with a pulley, while stretched or damaged cord can change the relationship between the two sides. If the bar twists noticeably, avoid using it for precision work until the cause is identified.
The Bar Feels Rough or Catches
Rough movement can come from debris, a bent guide, damaged pulley hardware, or excessive cable tension. Wipe accessible surfaces with a soft, dry cloth unless the manufacturer specifies another method. Lubricants are not automatically safe for every combination of wood, plastic, coated metal, and cord, so avoid applying them without product-specific guidance.
Lines Are Parallel to the Board but Not to the Paper
This usually means the sheet was mounted at an angle. The parallel bar is doing its job relative to the board, but the paper’s border is not aligned with that reference. Remove and reposition the sheet rather than trying to compensate by twisting the bar.
Limitations of a Parallel Bar Drafting Board
A parallel bar improves repeatable horizontal alignment, but it is not a measuring device. It does not establish scale, calculate dimensions, or confirm that a line is placed at a particular distance. Measurements still come from a scale, rule, divider, or other appropriate instrument.
It also depends on proper maintenance and a rigid mounting system. A loose board, damaged cable, or bent straightedge can introduce errors across the entire drawing. That matters especially when several related lines are built from the same reference, because one alignment problem may be repeated throughout a plan.
The bar may also be less useful for small portable sketches, field work, or drawings that need frequent rotation. In those situations, a T-square, compact straightedge, or other hand tool may be more convenient. The parallel bar is most valuable when a sheet remains fixed and repeated horizontal alignment is part of the task.
Care and Storage
Keep the board away from impacts that could bend the straightedge or shift its mounting points. When the board is not in use, protect the working edge from heavy objects and avoid placing tools where they can press against the cable or pulley system.
Dust the board and exposed hardware with a soft cloth. Do not assume that water, household cleaner, or solvent is safe for every finish. Wood surfaces, laminated faces, plastic guides, metal coatings, and printed measurement marks may require different care, so product documentation should control whenever it is available.
If the board must be transported, secure the parallel bar according to the manufacturer’s instructions. Letting a suspended bar swing during transport can put stress on cables and pulley mounts. A student moving equipment between a home workspace and a studio should also protect the drawing surface from scratches, since even a small raised spot can affect paper contact.
Frequently Asked Questions
Does a parallel bar draw perfectly horizontal lines automatically?
It provides a horizontal reference relative to the drafting board, but accuracy still depends on board alignment, paper placement, bar condition, and drawing technique. The bar does not correct a crooked sheet or a damaged mechanism.
Can a parallel bar replace a T-square?
For many fixed-board tasks, it can provide the same basic horizontal guidance. A T-square remains useful when portability, quick repositioning, or use across multiple boards matters.
Can I use a triangle with a parallel bar?
Yes. A triangle can rest against the bar to draw vertical or angled lines. The bar supplies the horizontal reference, while the triangle supplies the selected angle.
Why does my parallel bar move unevenly?
Uneven motion may be caused by cable tension, pulley or guide problems, loose mounting hardware, debris, or a damaged component. Consult the board’s instructions before attempting adjustments, especially if the cable routing is not obvious.
Is a parallel bar useful for digital drafting?
It is primarily a manual drafting tool. It may still be useful beside a computer for sketching, printed markups, or layout work, but digital drafting programs provide their own alignment and snapping functions.
The Practical Principle to Remember
A parallel bar drafting board works by linking a movable straightedge to a controlled support system that keeps both ends moving together. The result is a stable horizontal reference that travels across a fixed sheet. Once the board, paper, and bar are aligned, the drafter can combine that reference with triangles, scales, and measuring tools to build accurate manual drawings with less repeated repositioning.
