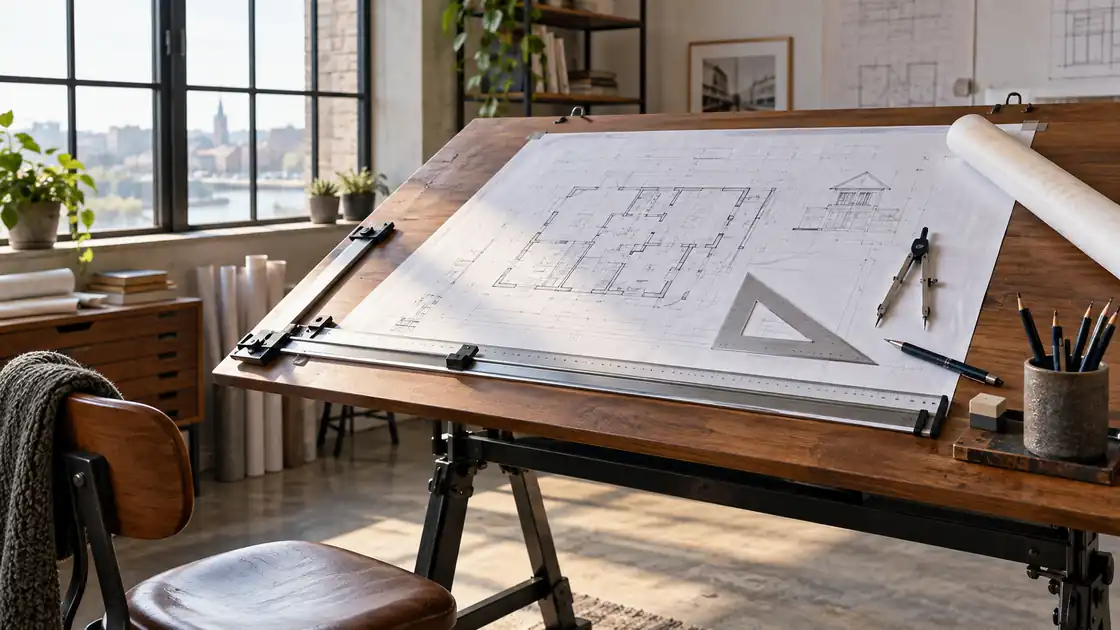
Paper tends to tell you when a drafting table is set up poorly. A sheet creeps downhill, a triangle catches on an uneven edge, and the line that looked perfect at the top of the page wanders by the time it reaches the bottom. Learning how to use a drafting table is largely about preventing those small disruptions through stable positioning, sensible adjustments, and a consistent drawing technique.
A drafting table is more than a large desk with an angled top. Its adjustable work surface supports drawing at a comfortable viewing angle, while features such as a lip, parallel rule, drafting machine, clips, or storage trays help keep tools and paper under control. The exact controls vary by table, so the manufacturer’s instructions remain important, but the basic workflow is similar across manual drafting setups.
What a Drafting Table Is Designed to Do
The main work surface of a drafting table can usually be raised from nearly flat to a steeper angle. A flat or shallow position is useful for writing, measuring, model work, and computer equipment. A tilted position brings a large sheet closer to the eyes and reduces the need to lean across the page while sketching or drawing precise lines.
Some tables include a raised edge along the lower side of the board. This lip prevents pencils, erasers, and paper from sliding onto the floor when the surface is inclined. Other tables use removable clips or a separate drawing board. A parallel rule may travel vertically across the surface, while a drafting machine combines a straightedge with angle-adjustable rulers.
These features are helpful, but they do not replace basic setup. A parallel rule that is not square to the board can guide several inaccurate lines in a row, and a loose tilt mechanism can allow the surface to shift while you work. Stability comes first, then alignment, then drawing.
Prepare the Table Before Drawing
Clear the board of loose tools, scraps, and dust. A tiny pencil shaving beneath a sheet can create a bump that affects a long line, while a metal clip left under the paper may leave a noticeable impression. Check that the table stands level enough to remain stable and that its locking knobs, hinges, or support braces are properly engaged.
Place the table where you can reach the entire working area without twisting repeatedly. Leave enough room behind the table for the surface to tilt and enough space at the front for your knees or drafting chair. A student working in a crowded bedroom may need to move a lamp or storage cart before raising the board, while someone in a studio may need to check that the tilted edge does not interfere with a neighboring workstation.
Set the Work Surface Angle
Release the table’s adjustment mechanism according to its instructions. Raise or lower the board with both hands if the design requires manual support, then engage the lock or brace before placing valuable drawings on it. Never assume that friction alone will hold the surface securely unless the manufacturer specifically designed it that way.
There is no universal drafting angle. A shallow incline may suit lettering or a large technical drawing, while a steeper angle may feel better for sketching or viewing a smaller sheet. Start with a modest tilt and adjust it after you have placed the paper and tools. If your shoulders rise, your wrist bends sharply, or you must reach too far across the page, the surface or chair height probably needs attention.
Check the Working Height
For seated work, adjust the chair so your feet have reliable support and your forearms can approach the board without lifting your shoulders. Some drafting chairs include a foot ring because the seat is higher than a standard office chair. A foot ring gives the feet somewhere to rest, but it does not mean you should perch without stable support.
Stand briefly and inspect the same setup from a different position. The board should be high enough for the task without forcing your neck to remain bent over the page. Alternating between seated and standing work can provide useful position changes, although the table itself should remain stable in both configurations.
Secure the Paper and Establish a Reference Edge
Place the drawing sheet so the area you use most often is easy to reach. Leave enough room for the lower edge of the board’s lip, clips, or parallel rule. If you are working from a formal layout, confirm the sheet orientation, border, title block location, and required margins before securing it.
For a simple board, low-tack drafting tape or removable tape can hold the corners. Apply tape over the paper edge rather than across important drawing areas, and avoid pressing adhesive onto delicate surfaces unless it is intended for that use. A clip can hold a sheet securely, but it may obstruct a border or create a raised area beneath a ruler.
With a parallel rule, pull or slide the rule across the board and compare it with the sheet edge or a known horizontal guideline. Draw a short test line near the top and another near the bottom. If the two lines are not parallel to the intended reference, stop and realign the rule before beginning the drawing. This quick check is much faster than discovering a skewed layout after dozens of lines.
How to Use a Drafting Table for Straight Lines
Rest the pencil, lead holder, or technical pen against the working edge of the straightedge. Keep the drawing instrument slightly tilted in the direction of travel when the tool’s design calls for it. Use steady pressure rather than pressing hard. Heavy pressure can wear the lead quickly, emboss the paper, or cause ink to pool along the edge.
- Align the straightedge. Position the parallel rule, T-square, or straightedge against the reference points. Check both ends instead of trusting one point of contact.
- Hold the guide securely. Keep one hand on the ruler or use the table’s locking feature if available. Do not allow the guide to rotate while the line is being drawn.
- Place the pencil or pen correctly. Keep the tip close to the guide without forcing it into the edge. For ink, make sure the drawing edge does not allow ink to run underneath.
- Draw in one controlled motion. Move from a comfortable direction and avoid stopping in the middle of a critical line. Rotate the pencil occasionally if you want to maintain a more even lead point.
- Inspect the result. Look for gaps, hooks at the beginning or end, uneven weight, or ink smears before moving the paper or guide.
When drawing a long line, your arm should do most of the movement rather than only your wrist. A short stroke from the wrist may feel precise at first, but it often produces a kink when extended across a large sheet. If the edge of the table interrupts your reach, reposition the sheet or change your working side instead of stretching across the board.
Using Triangles With a Parallel Rule
Set a triangle against the parallel rule to draw vertical lines or repeated angles. Keep the long edge of the triangle firmly against the rule while sliding it to the desired location. A 45-degree triangle and a 30/60-degree triangle provide different standard angle combinations, but the markings on the tool should guide the selection.
For repeated parallel lines, hold the triangle against the rule and move the triangle along the rule rather than rotating it by eye each time. This is especially useful for hatch patterns, elevation details, and construction lines. If the triangle rocks, clean the board and tool edges, then check for chips or dried ink that could be affecting contact.
Using the Table for Measuring and Layout
A drafting table provides a stable surface, but it does not determine the drawing scale. Use the scale, ruler, or measuring tool required by the assignment. An architectural scale, engineering scale, ordinary ruler, and metric rule are not interchangeable simply because they all have numbered markings.
Before marking a dimension, identify the drawing’s stated scale and select the matching edge of the scale tool. Keep the tool flat against the paper and read from the correct zero point. On a tilted board, it is easy for a ruler to slide a little while you transfer several measurements, so hold it lightly but firmly and avoid placing your palm on an area that must remain visible.
Use construction lines lightly and keep final lines distinct. Someone laying out a floor plan may need several faint guide marks before committing to walls, doors, and dimensions. Someone lettering a title block may need the board nearly flat and the page positioned closer to the body. The same table supports both tasks, but the surface angle, tool arrangement, and paper position may change.
Organize Tools Around the Active Drawing Area
Keep the tools used repeatedly within easy reach, but do not crowd the lower edge of the board. Pencils, lead holders, erasers, scales, triangles, and templates should have a predictable home. A shallow tray beside the table can prevent the familiar clatter of a pencil rolling off the tilted surface every few minutes.
Place sharp tools such as compasses and drafting dividers where they cannot catch on the paper. Store spare leads and erasers away from the active drawing so crumbs do not collect under the sheet. If you use ink, keep the bottle on a level surface rather than on a board that tilts, unless its container and holder are specifically designed for that position.
Lighting deserves attention too. Position a task lamp so your hand and tools do not cast a dark band across the area being drawn. A right-handed person may prefer light from the left, while a left-handed person may prefer the opposite arrangement, but the best position depends on the lamp, room lighting, and the direction of the work. Keep cords away from adjustment joints and walking paths.
Practical Drafting Table Techniques
For Large Sheets
Start with the sheet centered around the portion that receives the most detail, not necessarily around the physical middle of the board. A large architectural sheet may extend beyond the most comfortable reach, so work in zones and reposition the sheet when needed. Keep the paper supported at several points rather than allowing a loose corner to hang over the edge.
When moving a large sheet, secure or remove loose tools first. Lift the paper rather than dragging it across a dusty board, especially if graphite has already been applied. A clean sheet that slides smoothly is far easier to preserve than one with a broad gray streak across the margin.
For Lettering
Use a shallower angle if that gives your hand better control, and establish light guide lines before writing final letters. A lettering guide or triangle can help maintain consistent height and alignment, but it should be cleaned frequently because graphite and ink residue transfer quickly to pale paper.
Rest your hand on a clean scrap sheet when working over completed areas. This reduces smudging from natural skin oils and graphite, particularly on large shaded drawings. Move the protective sheet as the work progresses instead of repeatedly rubbing the finished area.
For Sketching
Sketching does not require every line to be guided, so you may prefer a lower angle and more open board area. Keep the pencil sharp enough for the kind of mark you want, but do not treat a drafting table as a substitute for a sketchbook or portable drawing surface. If you need to draw outdoors or move frequently, a rigid board with secure clips may be more practical than a full table.
Common Problems and Their Fixes
| Problem | Likely Cause | Useful Check |
|---|---|---|
| Paper slides downhill | Insufficient clips, tape, or lower support | Secure the sheet and confirm the table lip is properly positioned |
| Horizontal lines drift | Parallel rule is loose, dirty, or misaligned | Clean the contact surfaces and test the rule at two points |
| Ink smears under the ruler | Ruler edge is touching wet ink | Use a raised inking edge or allow ink to dry before moving the guide |
| Board moves while drawing | Lock, brace, or hinge is not fully engaged | Stop work and inspect the adjustment mechanism |
| Shoulders or neck feel strained | Work height, angle, reach, or chair support is unsuitable | Change one adjustment at a time and vary position regularly |
If the table continues to move after the adjustment mechanism is engaged, do not compensate by pressing harder on the board. A loose hinge, worn locking part, or damaged support may require manufacturer-specific service. Continuing to draw on an unstable surface can ruin alignment and may create a safety problem if the board drops suddenly.
Cleaning and Maintaining a Drafting Table
Remove graphite dust, eraser crumbs, and paper fibers with a soft, dry cloth or the cleaning method specified by the manufacturer. Avoid spraying cleaner directly onto a board, ruler track, hinge, or drafting machine. Liquid can reach moving parts or damage a surface coating before you notice it.
Clean the table’s working edges and guides regularly. A buildup of graphite can make a straightedge feel gritty and may transfer dark marks to a clean sheet. Inspect screws, knobs, cables, and support braces periodically, but do not lubricate a mechanism unless the instructions identify a suitable lubricant and application method.
Protect the surface when cutting, gluing, or building models. A drafting table is not automatically a cutting table, and a blade can damage a finish or create a ridge that affects future drawings. Use a suitable cutting mat or separate work surface when the task involves knives, wet adhesives, plaster, or other materials that may harm the board.
Frequently Asked Questions
Should a Drafting Table Be Flat or Angled?
Use the position that supports the task. A flatter surface may suit writing, measuring, model work, or computer equipment, while an inclined surface may provide a better view and reach for drawing. Adjust the angle gradually and lock the board before working.
Do You Need a Drafting Chair?
Not necessarily. The important relationship is between your chair, feet, arms, and work surface. A standard chair may work with a lower table position, while a taller drafting chair may be useful when the board is elevated. If your feet cannot rest securely, use the table’s foot support or another stable support designed for the setup.
How Do You Stop Paper From Sliding on a Drafting Table?
Use the table’s lower lip, clips, removable drafting tape, or another paper-holding method suitable for the surface and sheet. Check that the board is not tilted more steeply than necessary and that dust is not preventing tape or clips from gripping properly.
Can You Use a Drafting Table for a Laptop?
Many drafting tables can support occasional laptop use when positioned near flat, but the table may not provide the cable management, wrist support, or viewing setup of a computer desk. Keep the laptop stable, prevent it from sliding, and follow the table’s load and use instructions.
How Do You Keep a Drafting Table Square?
Use a known straight reference, such as the board edge or a properly aligned parallel rule, and test lines at more than one location. If a permanent rule or drafting machine is installed, check its alignment according to the manufacturer’s procedure rather than assuming the factory setting remains unchanged.
Make the Table Support the Drawing
Using a drafting table well means treating the entire setup as a system. Secure the paper, align the guide, choose an angle that suits the task, arrange tools within reach, and check the table before committing to detailed work. A few quiet seconds spent on those adjustments can keep a clean border clean, a long line straight, and a long drawing session far less awkward.
